Axial Ryft Attack Light Kit


Axial Ryft Attack Light Kit
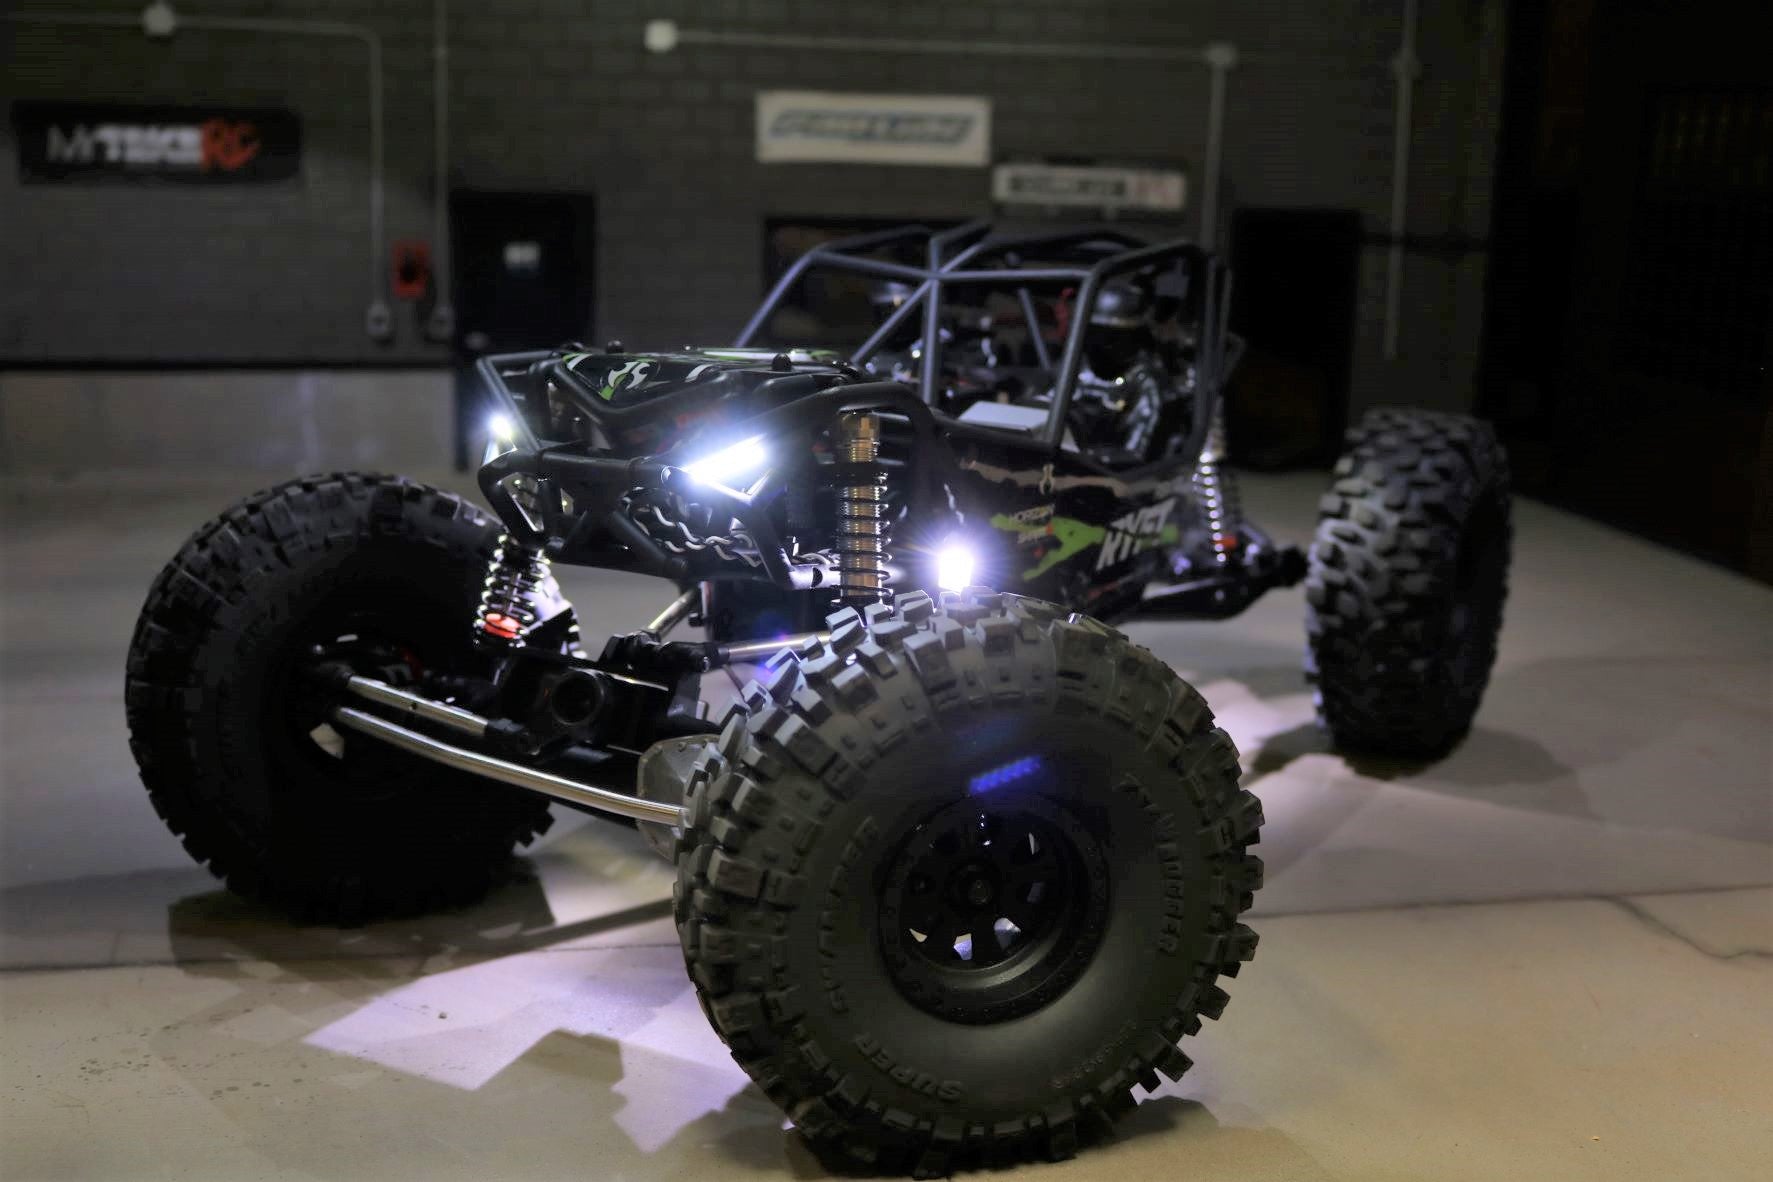
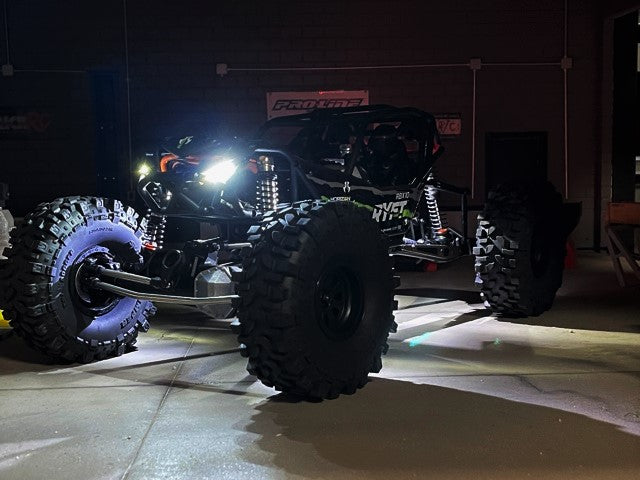
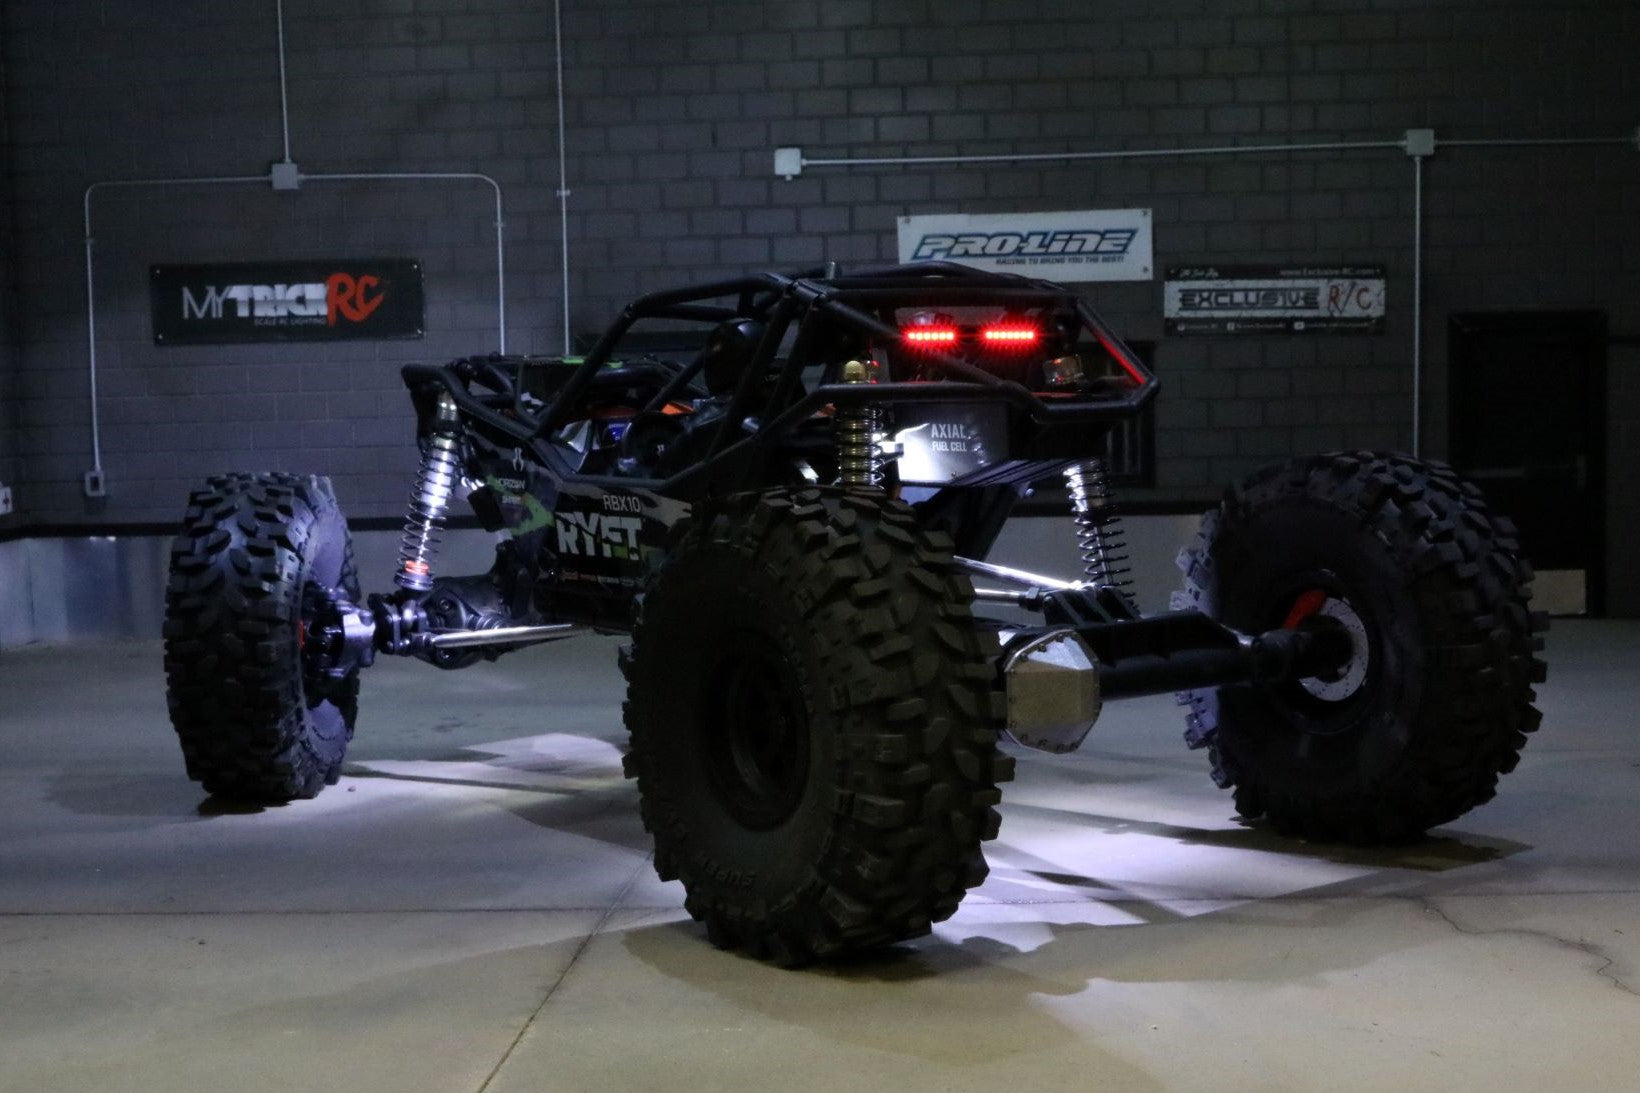
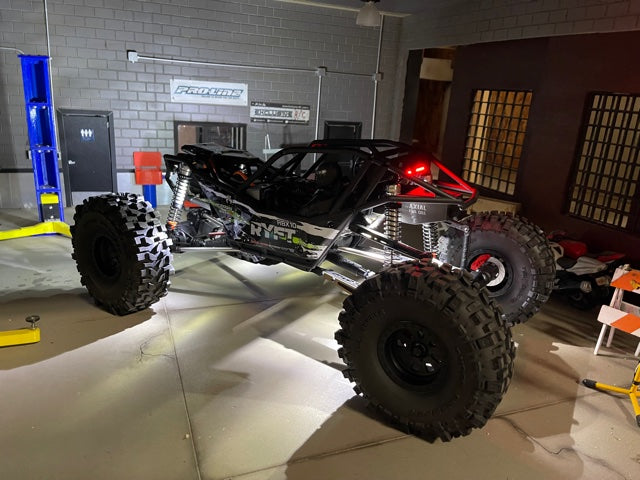
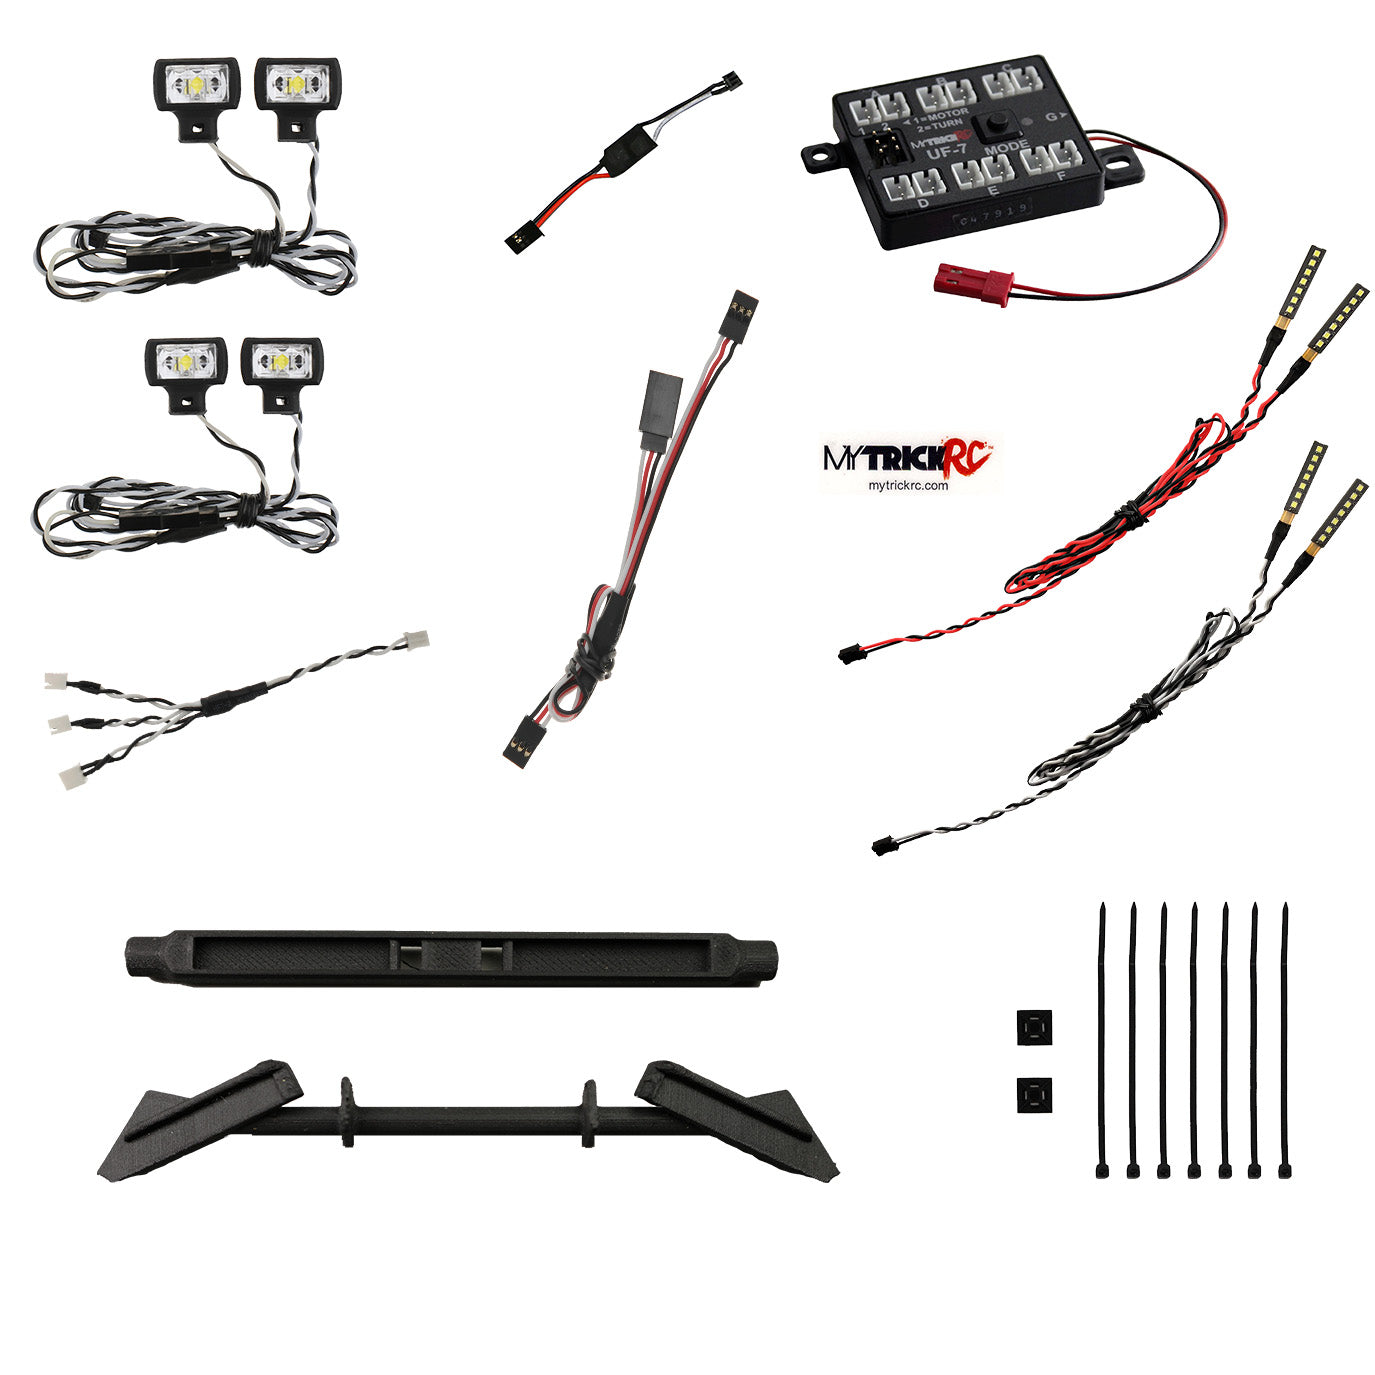
The Axial Ryft Attack Light Kit is the perfect compliment to your Axial Ryft RBX10.
The MyTrickRC Axial Ryft RBX10 Attack Kit is nice and compact, and offers all High Power LED Headlights with Mounting Bracket, Taillight Bar and Rock Lights.
Our UF-7R Lighting Controller comes on this kit, and it draws power directly from the receiver. The Axial Ryft RBX10 Attack Light Kit is Plug and Play and the Lights will be ON whenever the truck is On.
Features:
- Hi Performance / Integrated Light Buckets
- Insanely Bright Light Kit for your Ryft
- Easy Installation
- Minimal Wiring
Includes:
- UF-7R Controller
- 1 Pair of White Attack 27mm Strip Headlights
- 1 Pair of Red Attack 27mm Strip Tail Lights
- 2 Pair High Spot Lights
- 1pc 3-Way LED Splitter
- Zip Ties Set
- Attack Scale Bumper Stickers
- Custom Headlight and Tail Light Mounts
- 1 Y-Cable for ESC
NEW Improved Design Instructions:
STEP 1 - Remove Excess Support Material from Parts

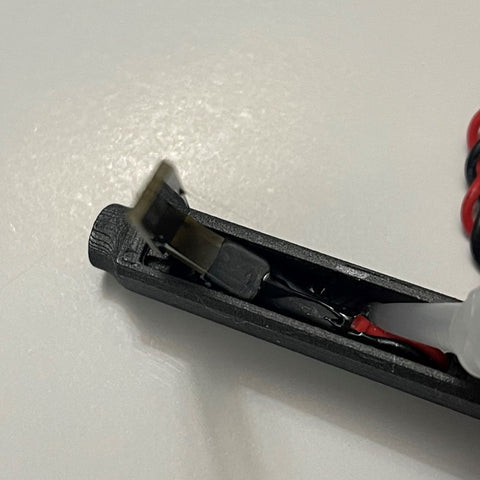
STEP 2 - Insert LED into Rear Light Bar with LEDs facing outward as shown. NEVER pull on LEDs, always push LED through hole. The flexible part of the LED is somewhat fragile and can break if you twist them too much during installation.

STEP 3 - Gently bend the LED onto it's own wire as shown

STEP 4 - Apply Zap Goo, Shoe Goo, or E6000 to LED pockets of Light Bar

STEP 5 - Push wire into glue, then apply a second layer for the LED to bond to
STEP 6 - Apply a SMALL amount of glue to the top of the PCB. BE CAREFUL not to get glue on the LEDs. If you do, then wipe it off before installing the lenses. Only a SMALL amount of glue is needed here

STEP 7 - Press in the Lenses. Tail Lights are DONE!

STEP 8 - Apply Zap Goo, Shoe Goo, or E6000 to LED to the Headlight Bracket as shown

STEP 8 - Place the LED as shown, with the flexible end hanging off the part. We recomend that you apply a small amount of tape to hold the LED in position before doing the other side.

STEP 9 - Once LED glue is fully set, wrap the wire around the Bracket. Be sure to hook the wires into the small C clip on the Bracket. Apply a more generous amount of glue here to both the C Clip area, and the flexible part of the LED to provide it good support after drying. You are DONE installing the LEDs!

- Ultra Compact Design
- High Intensity LEDs
- Includes SpotLights
- Plug and Play
- Tail Light Bar
SKU: MYK-AX12
Customer Reviews
Based on 5 reviews
Write a review